Manage Company Downtime Catalogs
Quick Demo · 0:14
00:14Manage Company Downtime Catalogs
Chapters
Searchable Transcript (2 steps)
- 00:01Create a top-level Stoppage Class with a standardized name, code, and description.
- 00:06Switch across Stoppage Classes, Failure Types, and Failure Reasons to drill down and standardize root-cause codes.
What Are Downtime Catalogs?
A Downtime Catalog is a standardized three-level taxonomy that operators and reliability teams use to classify why production stopped or slowed down:
text
1. Stoppage Class   (Highest grouping: Planned Downtime, Unplanned Downtime, External Delays)
     └── 2. Failure Type    (Technical category: Mechanical Failure, Electrical Trip, Instrumentation)
           └── 3. Failure Reason  (Specific root cause: Gearbox Overheating, Breaker Trip, Belt Tear)
Creating Downtime Catalogs at the Company level establishes one corporate Pareto taxonomy that any plant under the company can inherit automatically, enabling apples-to-apples downtime comparisons across every site.
Step 1: Open Company Downtime Catalogs
- Open Configuration -> Companies.
- On the target company card, select Manage -> Downtime Catalogs (or open Downtime Catalogs in Company scope).
- Review the three navigation tabs: Stoppage Classes, Failure Types, and Failure Reasons.
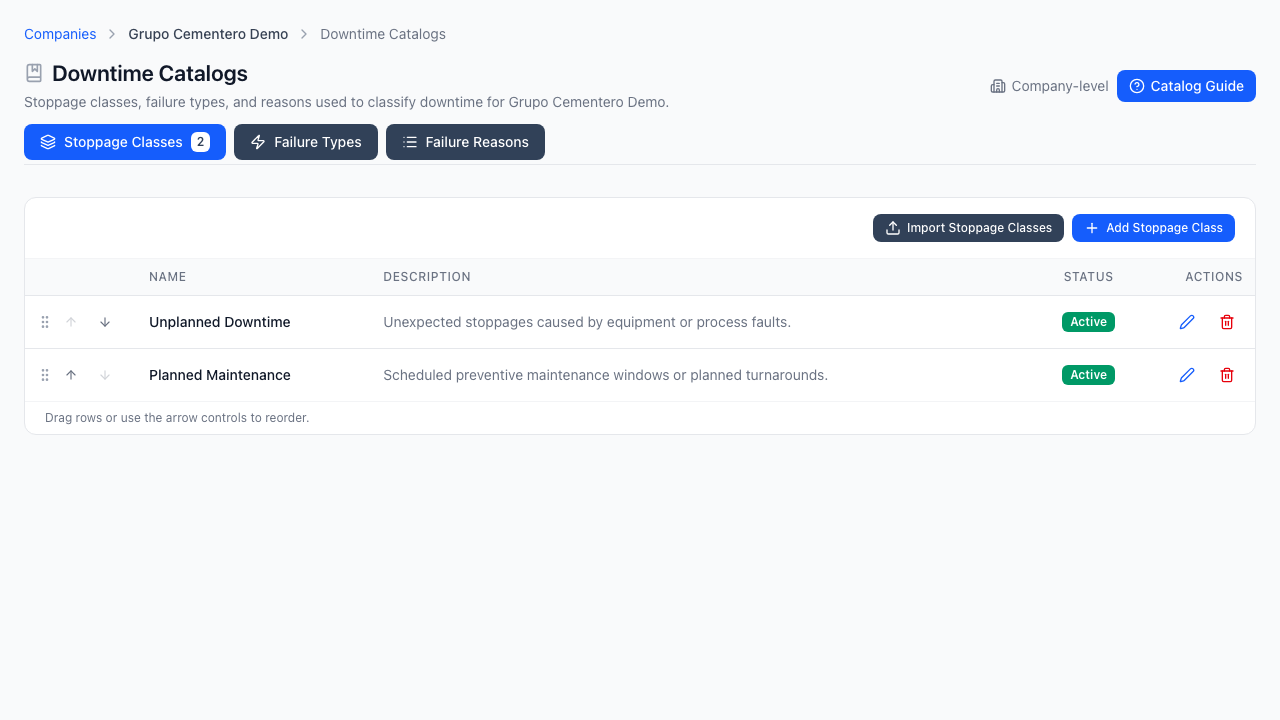
Step 2: Create a Stoppage Class
- On the Stoppage Classes tab, click Add Stoppage Class.
- Enter the Name (for example,
Unplanned Downtime), a short Code (UNP), and an optional Description. - Save the record to make the class available as a parent for Failure Types.
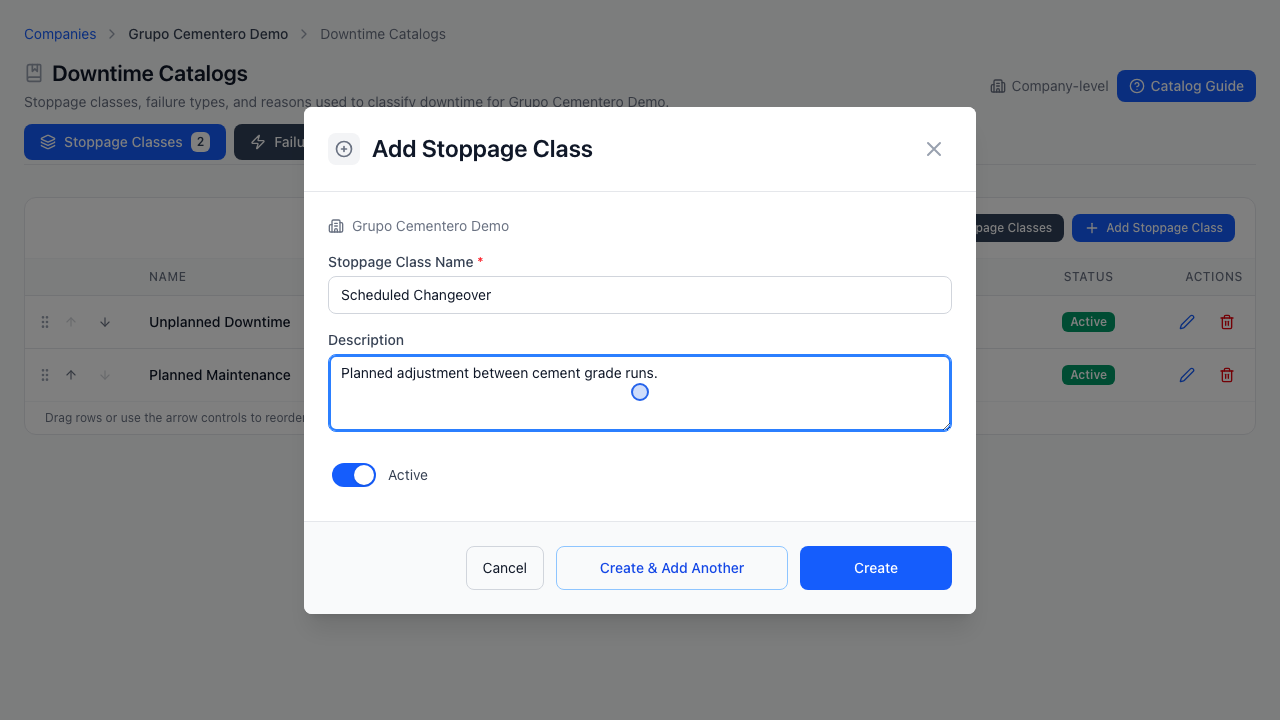
Step 3: Add Failure Types and Failure Reasons
- Switch to the Failure Types tab, select Add Failure Type, choose the parent Stoppage Class, and define its Name and Code (for example,
Mechanical/MEC). - Switch to the Failure Reasons tab.
- Choose a Failure Type in the filter dropdown at the top of the panel to enable Add Failure Reason.
- Add specific assignable reasons (for example,
Bearing Overtemperature/MEC-01).
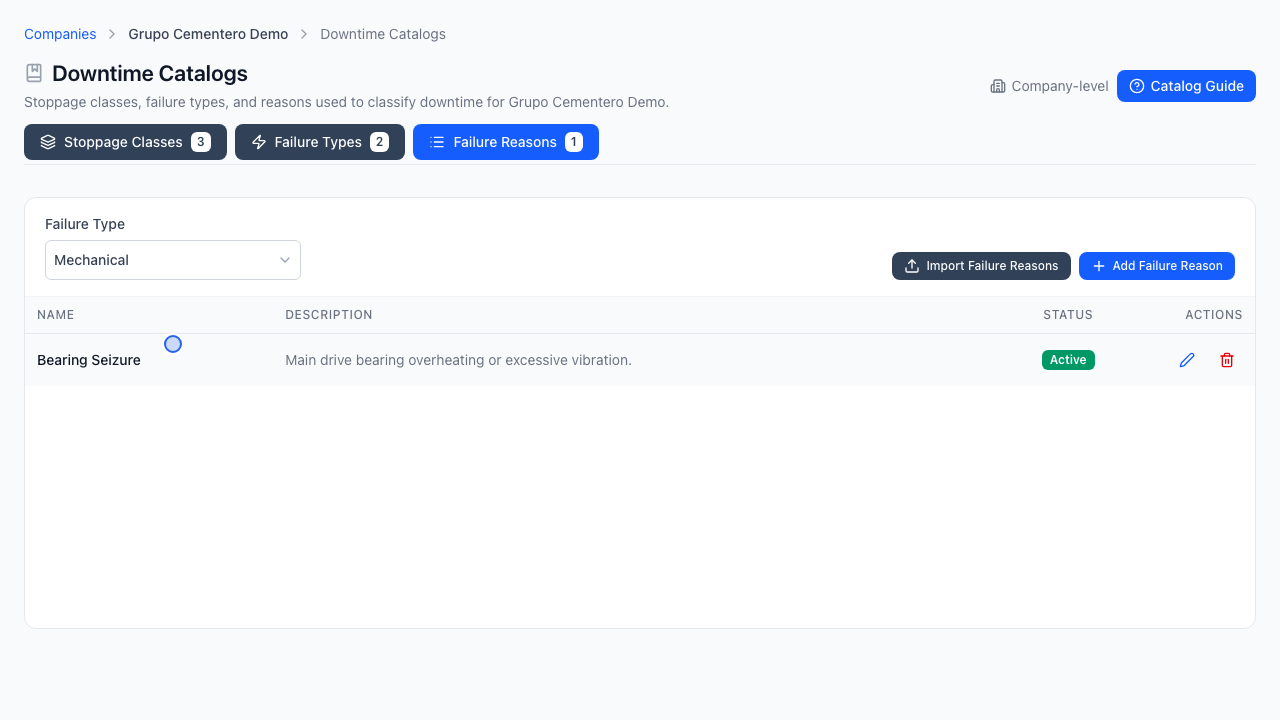
Editing, Filtering & Deletion Rules
- Each row supports Edit (rename or adjust descriptions/codes) and Delete (confirmation required).
- You cannot delete a Stoppage Class that still contains child Failure Types, or a Failure Type that still contains child Failure Reasons—remove or reassign child records first.
- Plants with Use company downtime catalogs enabled see these definitions immediately in read-only mode.